Self-hosted Kubernetes fleet management
Manage and orchestrate your Kubernetes clusters from a single, intuitive interface. Accelerate your DevOps pipeline with automated deployment workflows, and enforce compliance requirements with cluster-wide, granular security policies.
Secure, flexible, and easy
Secure and scalable pull-based architecture. A single pane of glass to understand and maintain complex Kubernetes fleets.
Self-hosted and secure in your cloud
Multi-cloud and multi-cluster support
Build release pipelines with no scripts
Fully customizable with resources defined in Git
Full visibility into your service and cluster fleet
Used by fast-moving teams at
Provision and manage Kubernetes clusters. Continuously deploy services. At scale.
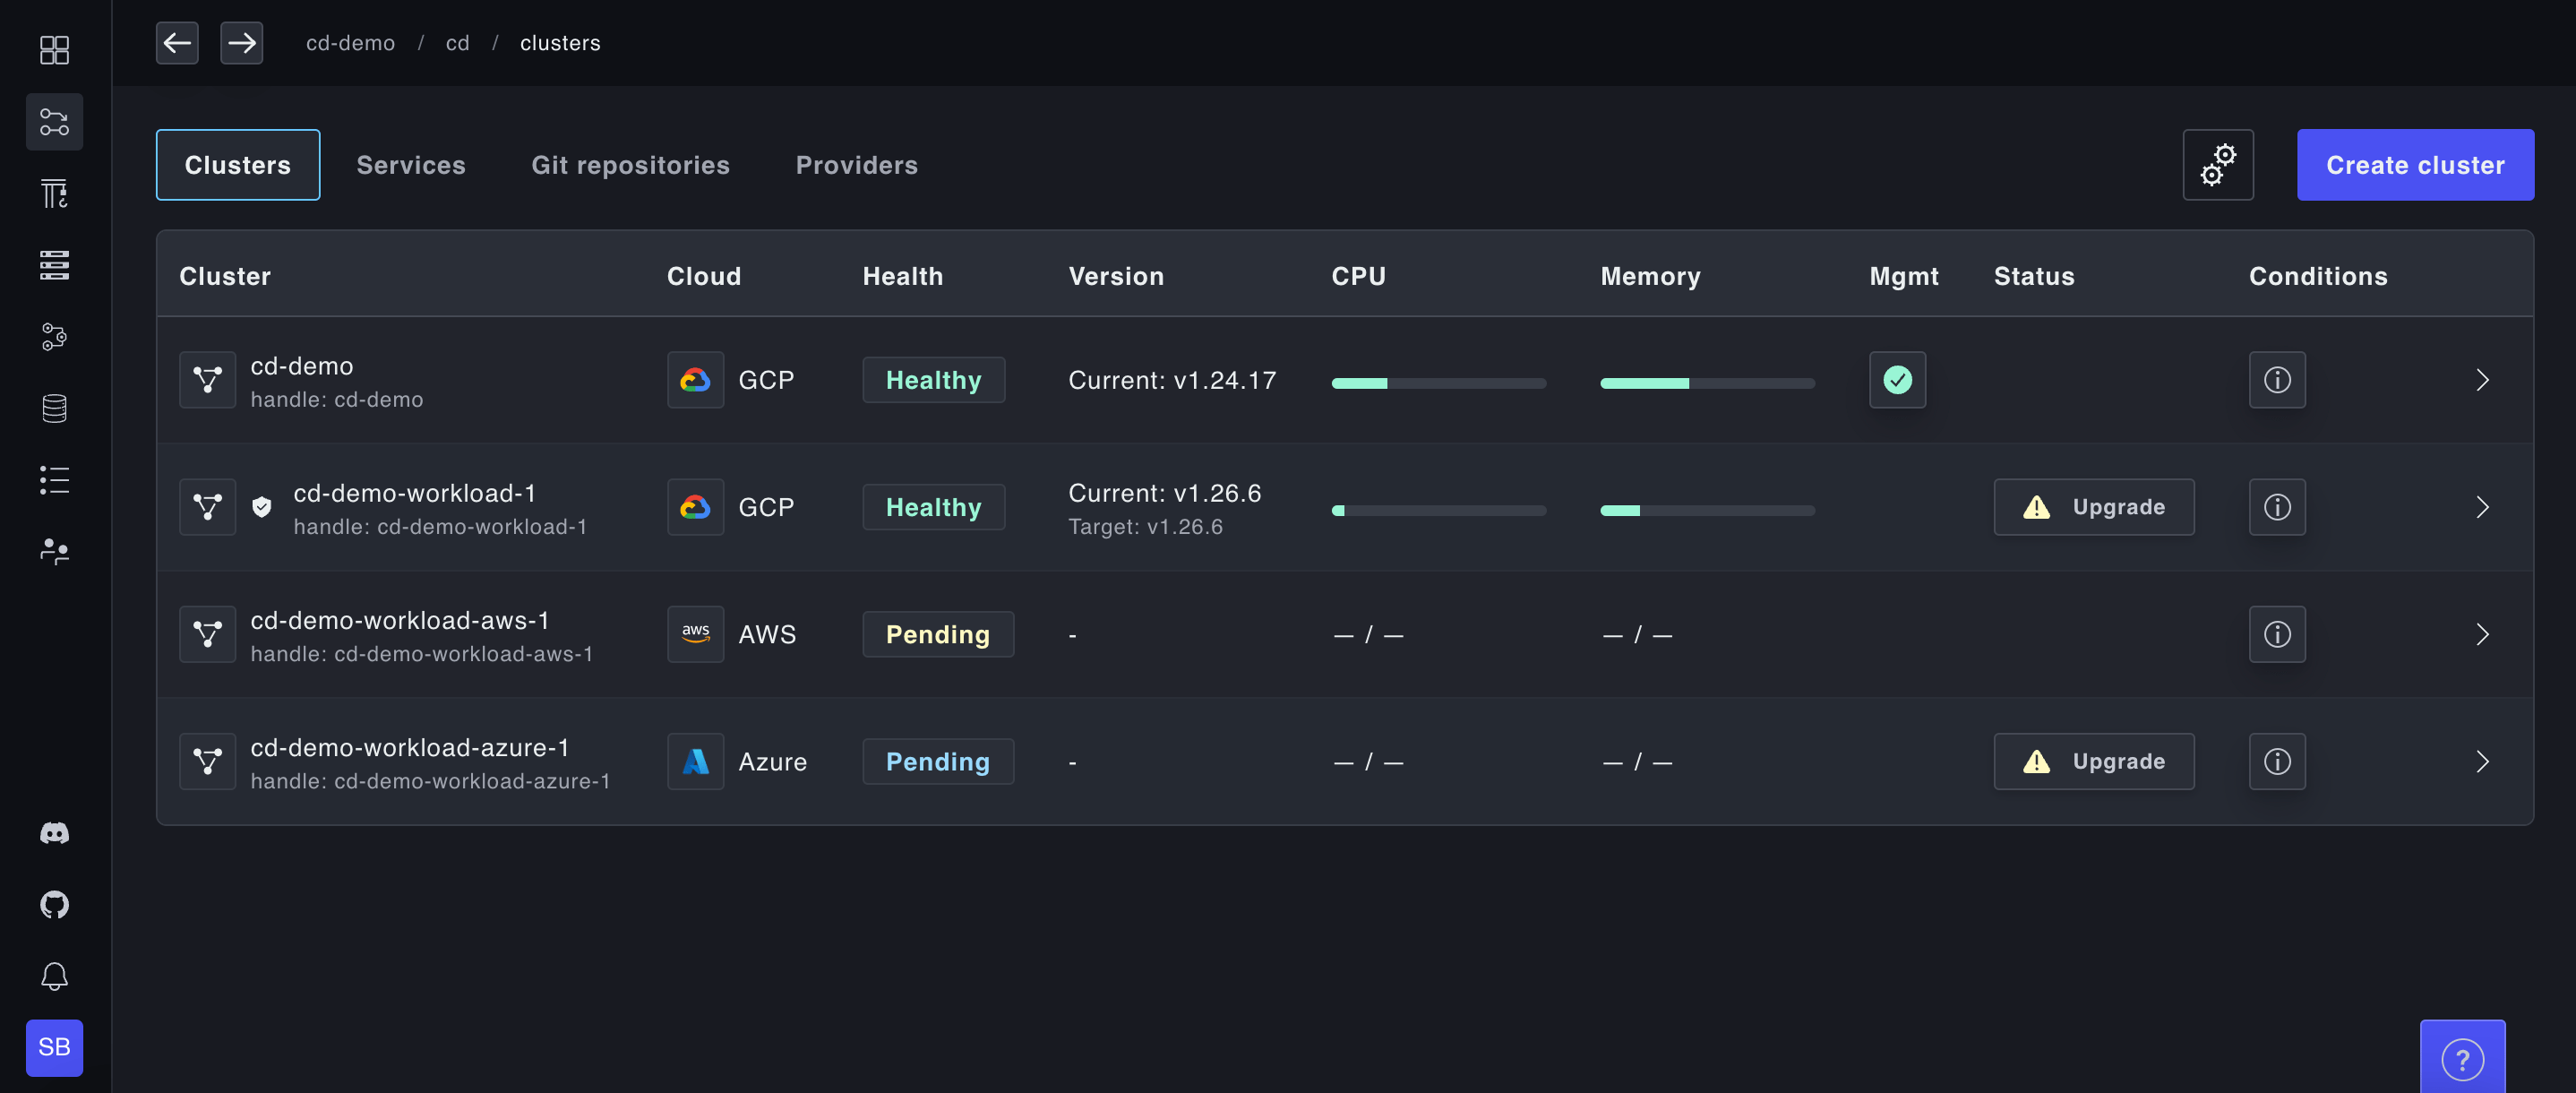
Easily create, import and view your clusters
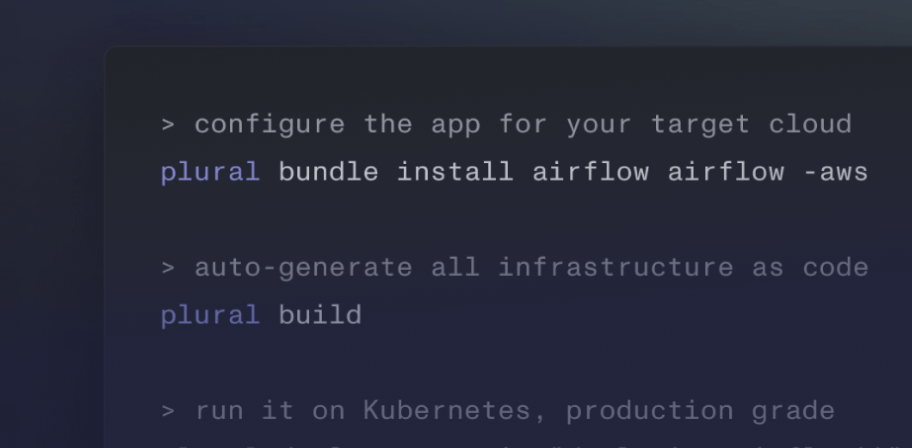
Instantly spin up and view clusters across multiple cloud providers and accounts without writing Terraform. We expose a single GraphQL API that can be integrated with any infrastructure-as-code provider or fronted by a Kubernetes operator for GitOps management. Already have K8s clusters? No sweat. Use our bring-your-own-Kubernetes option to ingest your clusters for Plural to manage.
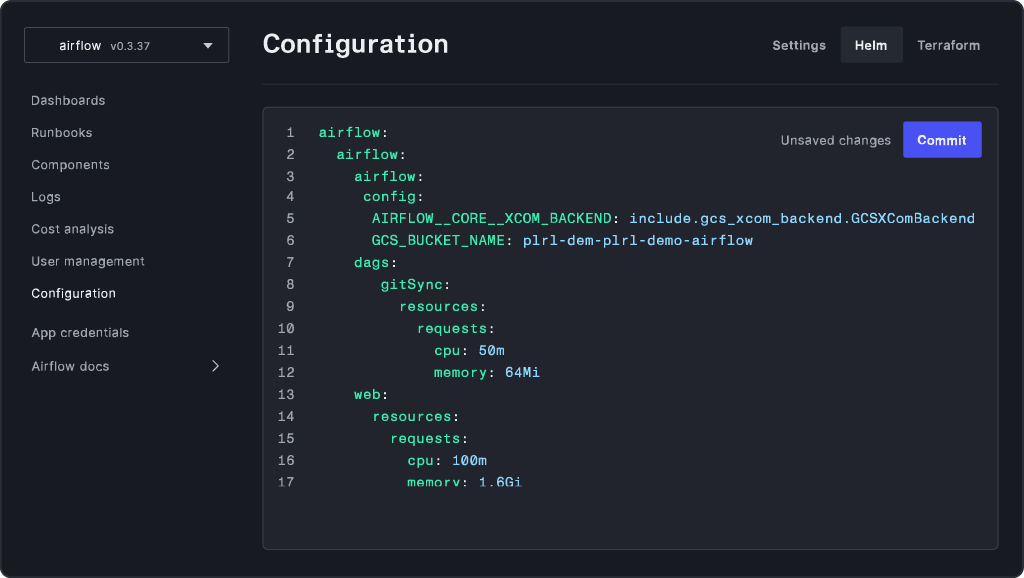
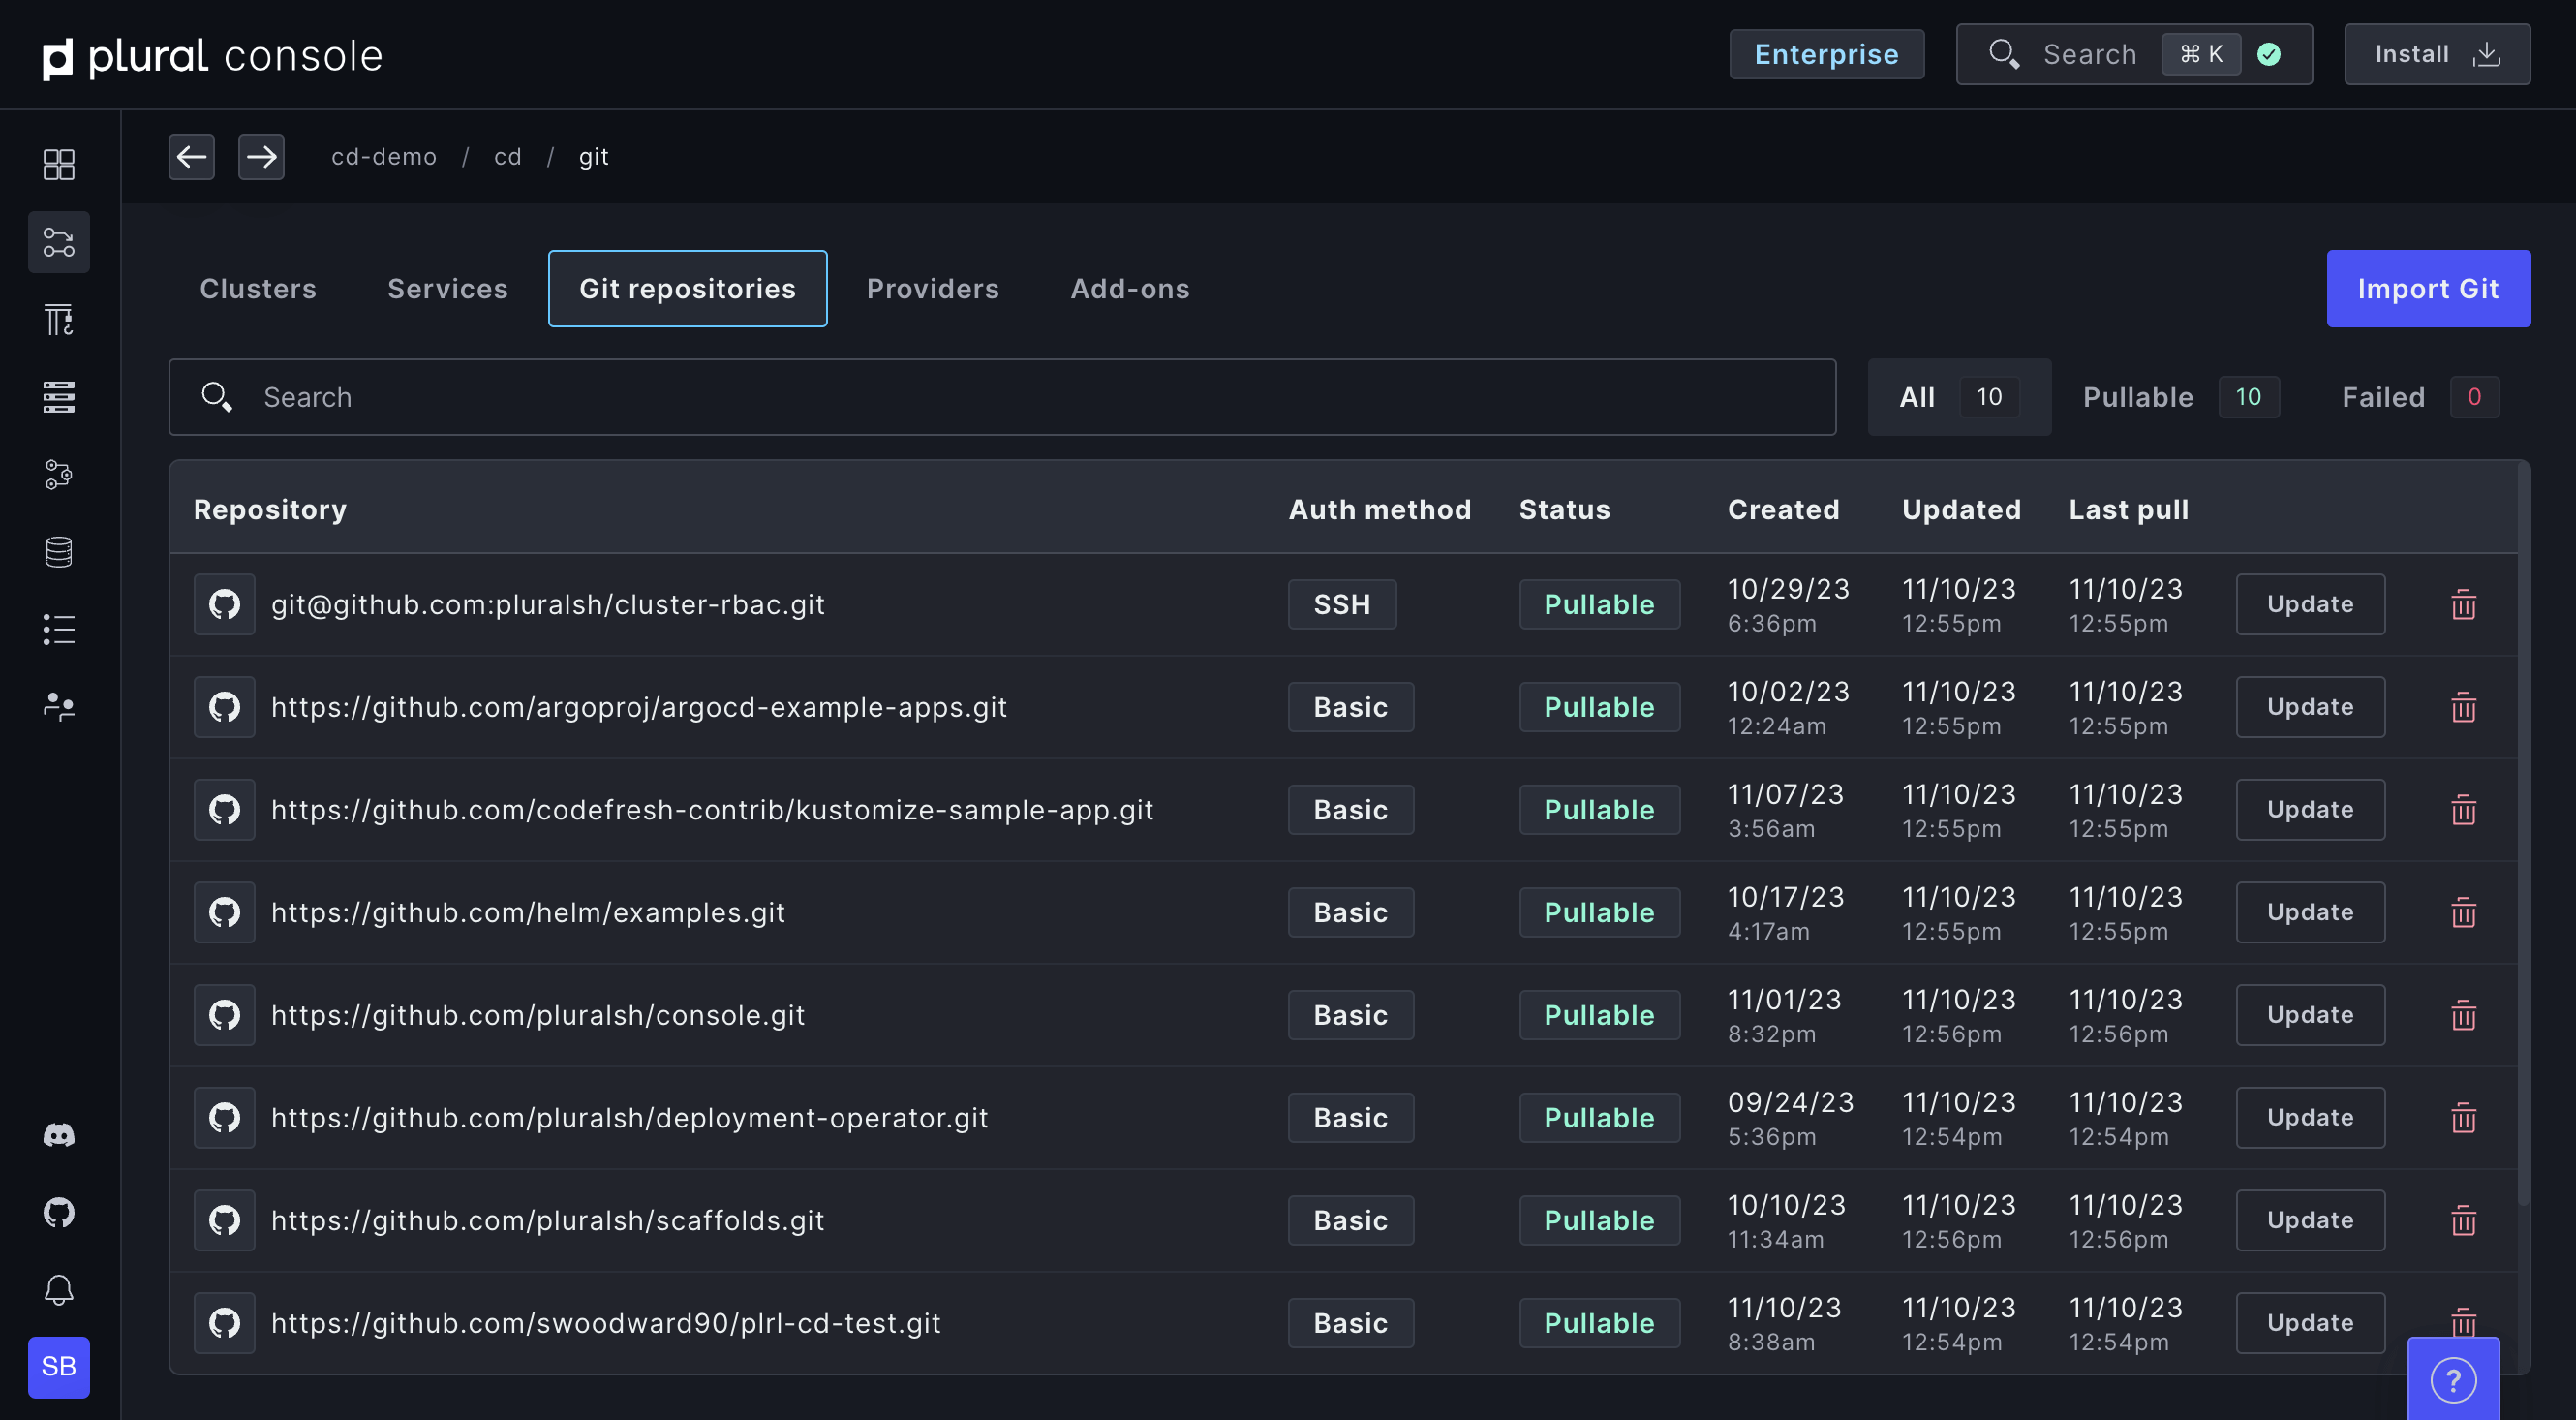
Deploy from Git in one click
Import your Git repositories and deploy services to clusters in a couple of clicks. Take advantage of our customization options and centralized secrets management to configure your deployment exactly the way you want it.
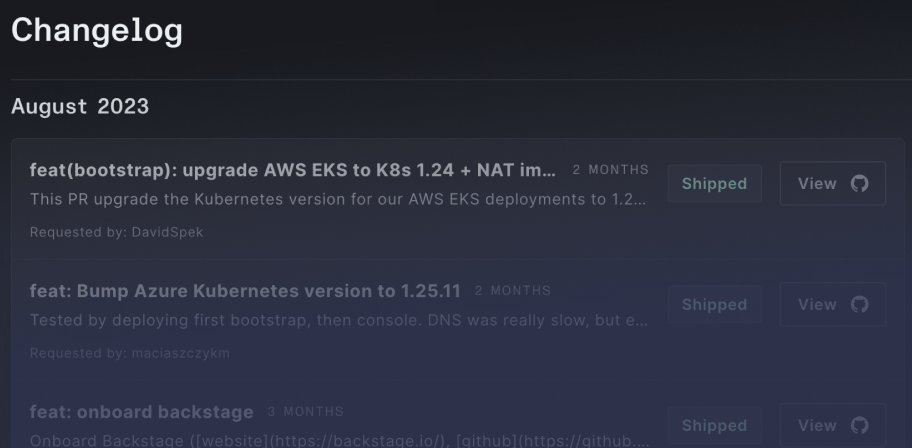
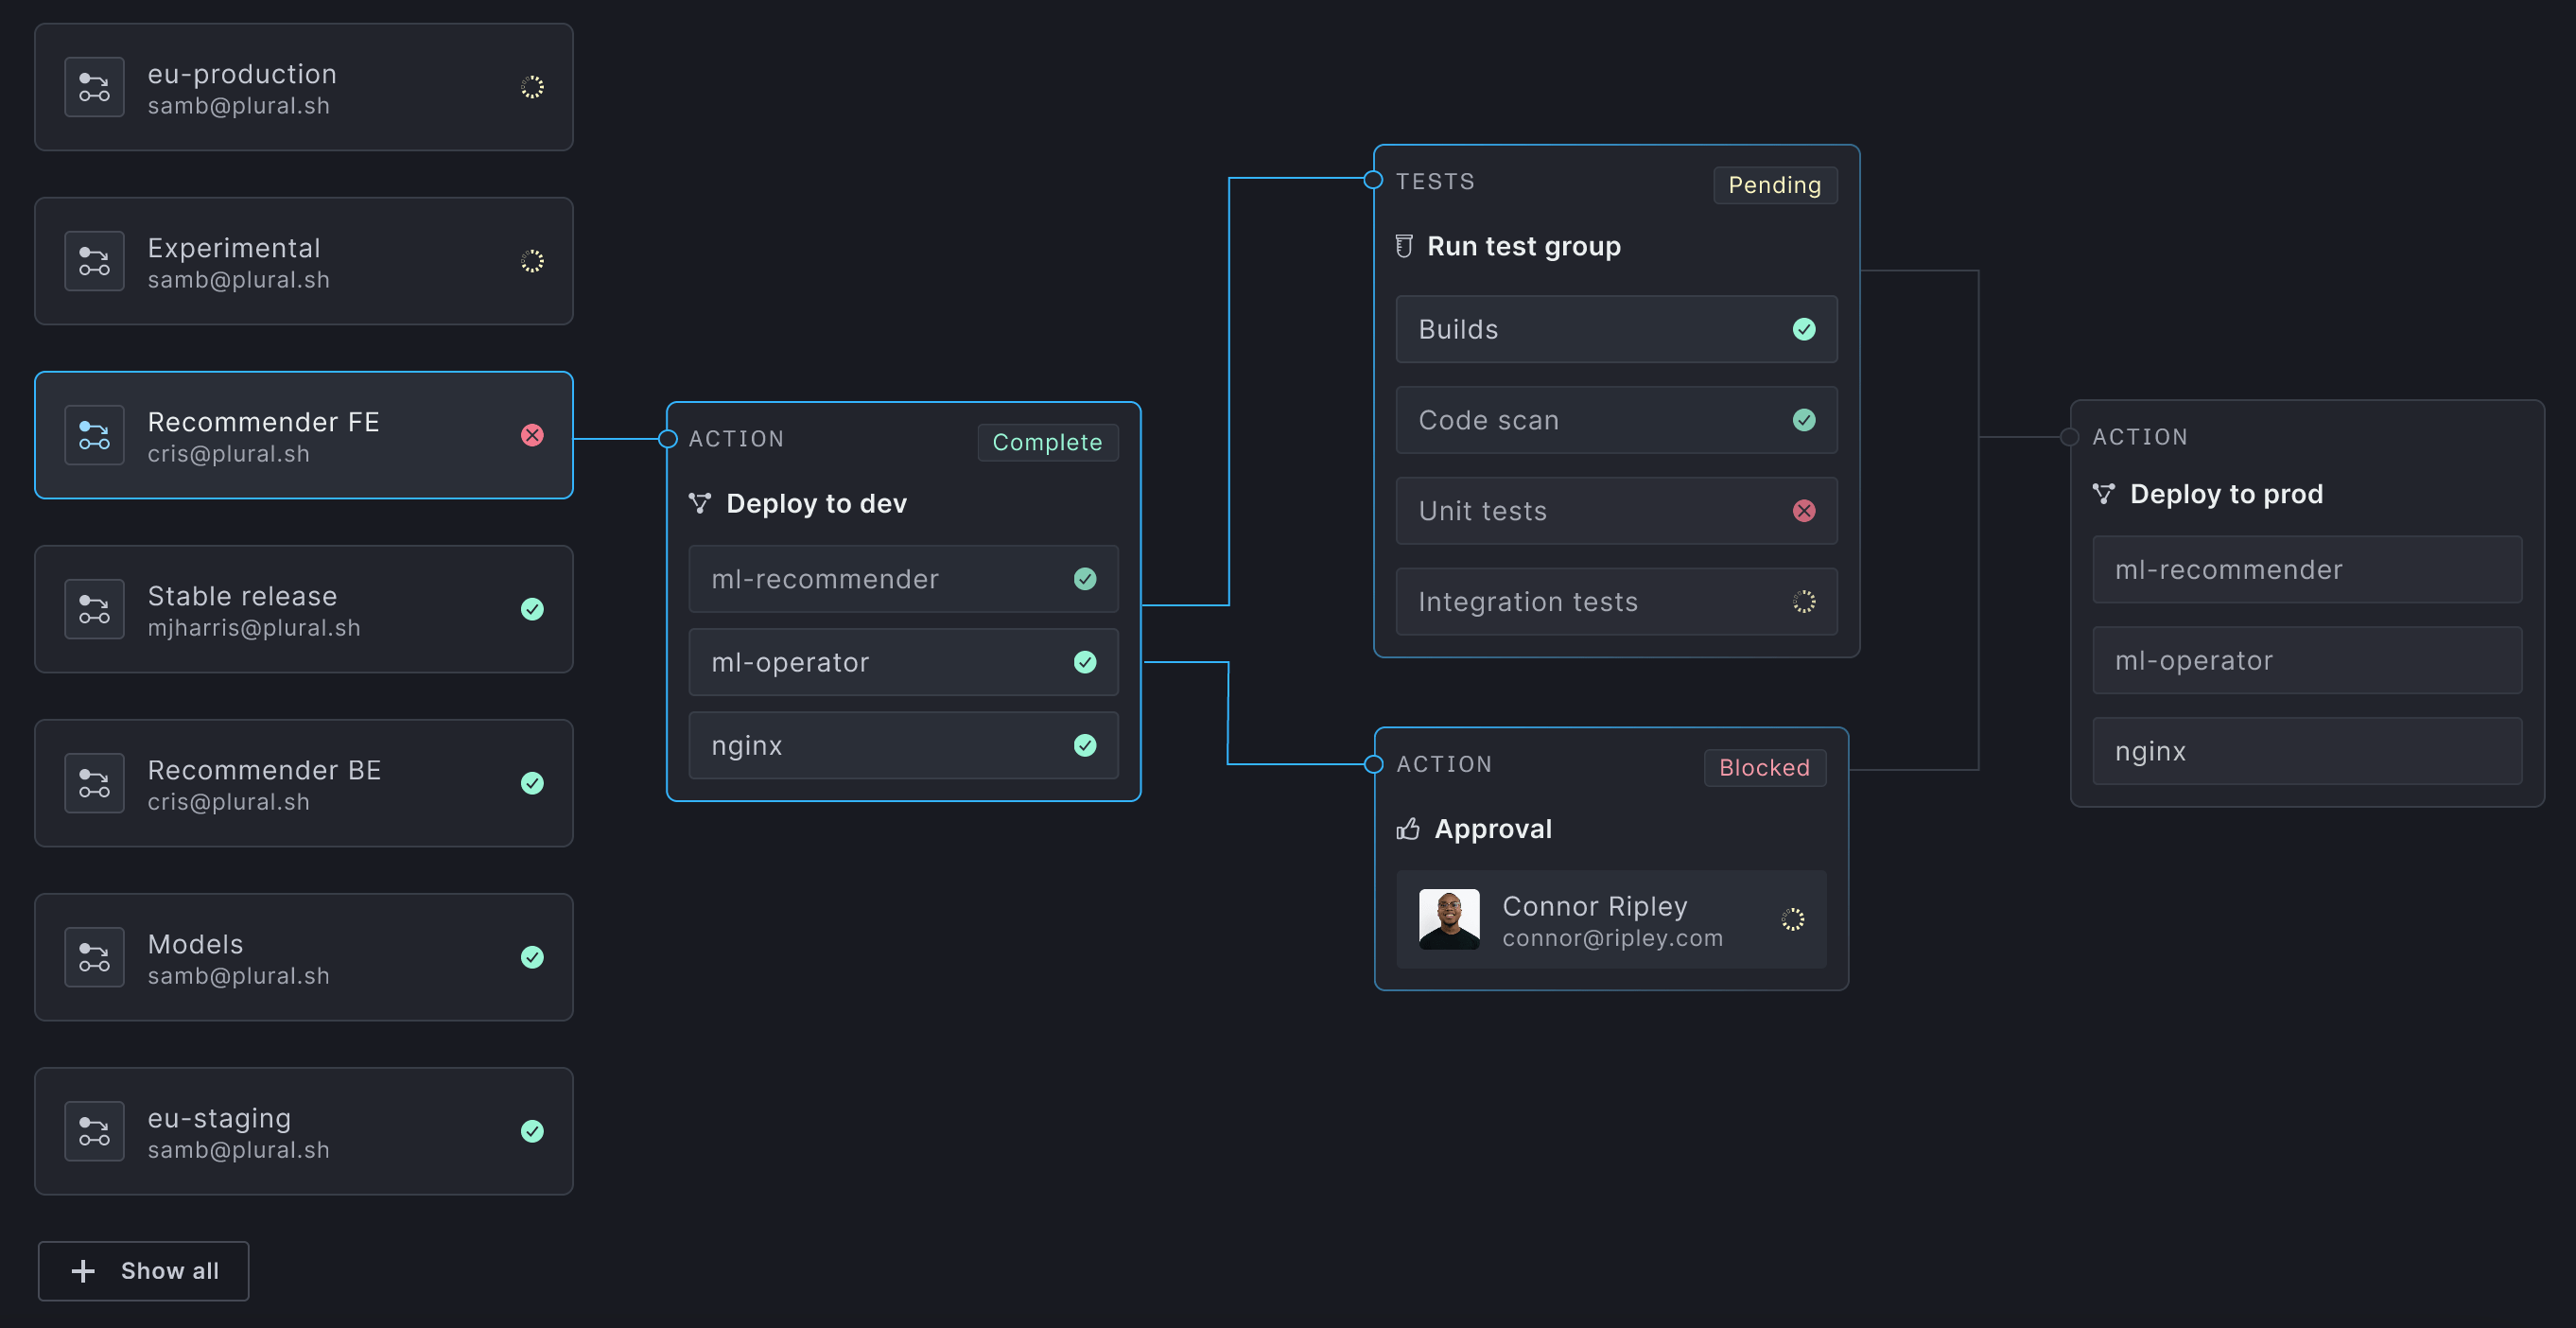
Build powerful pipelines with no scripting
Our Enterprise-grade GitOps continuous deployment is awesome. Configure promotions between environments with no scripting required. Build gated promotions. Trigger pipelines on events. Fully automate your path to production with secure secret injection.
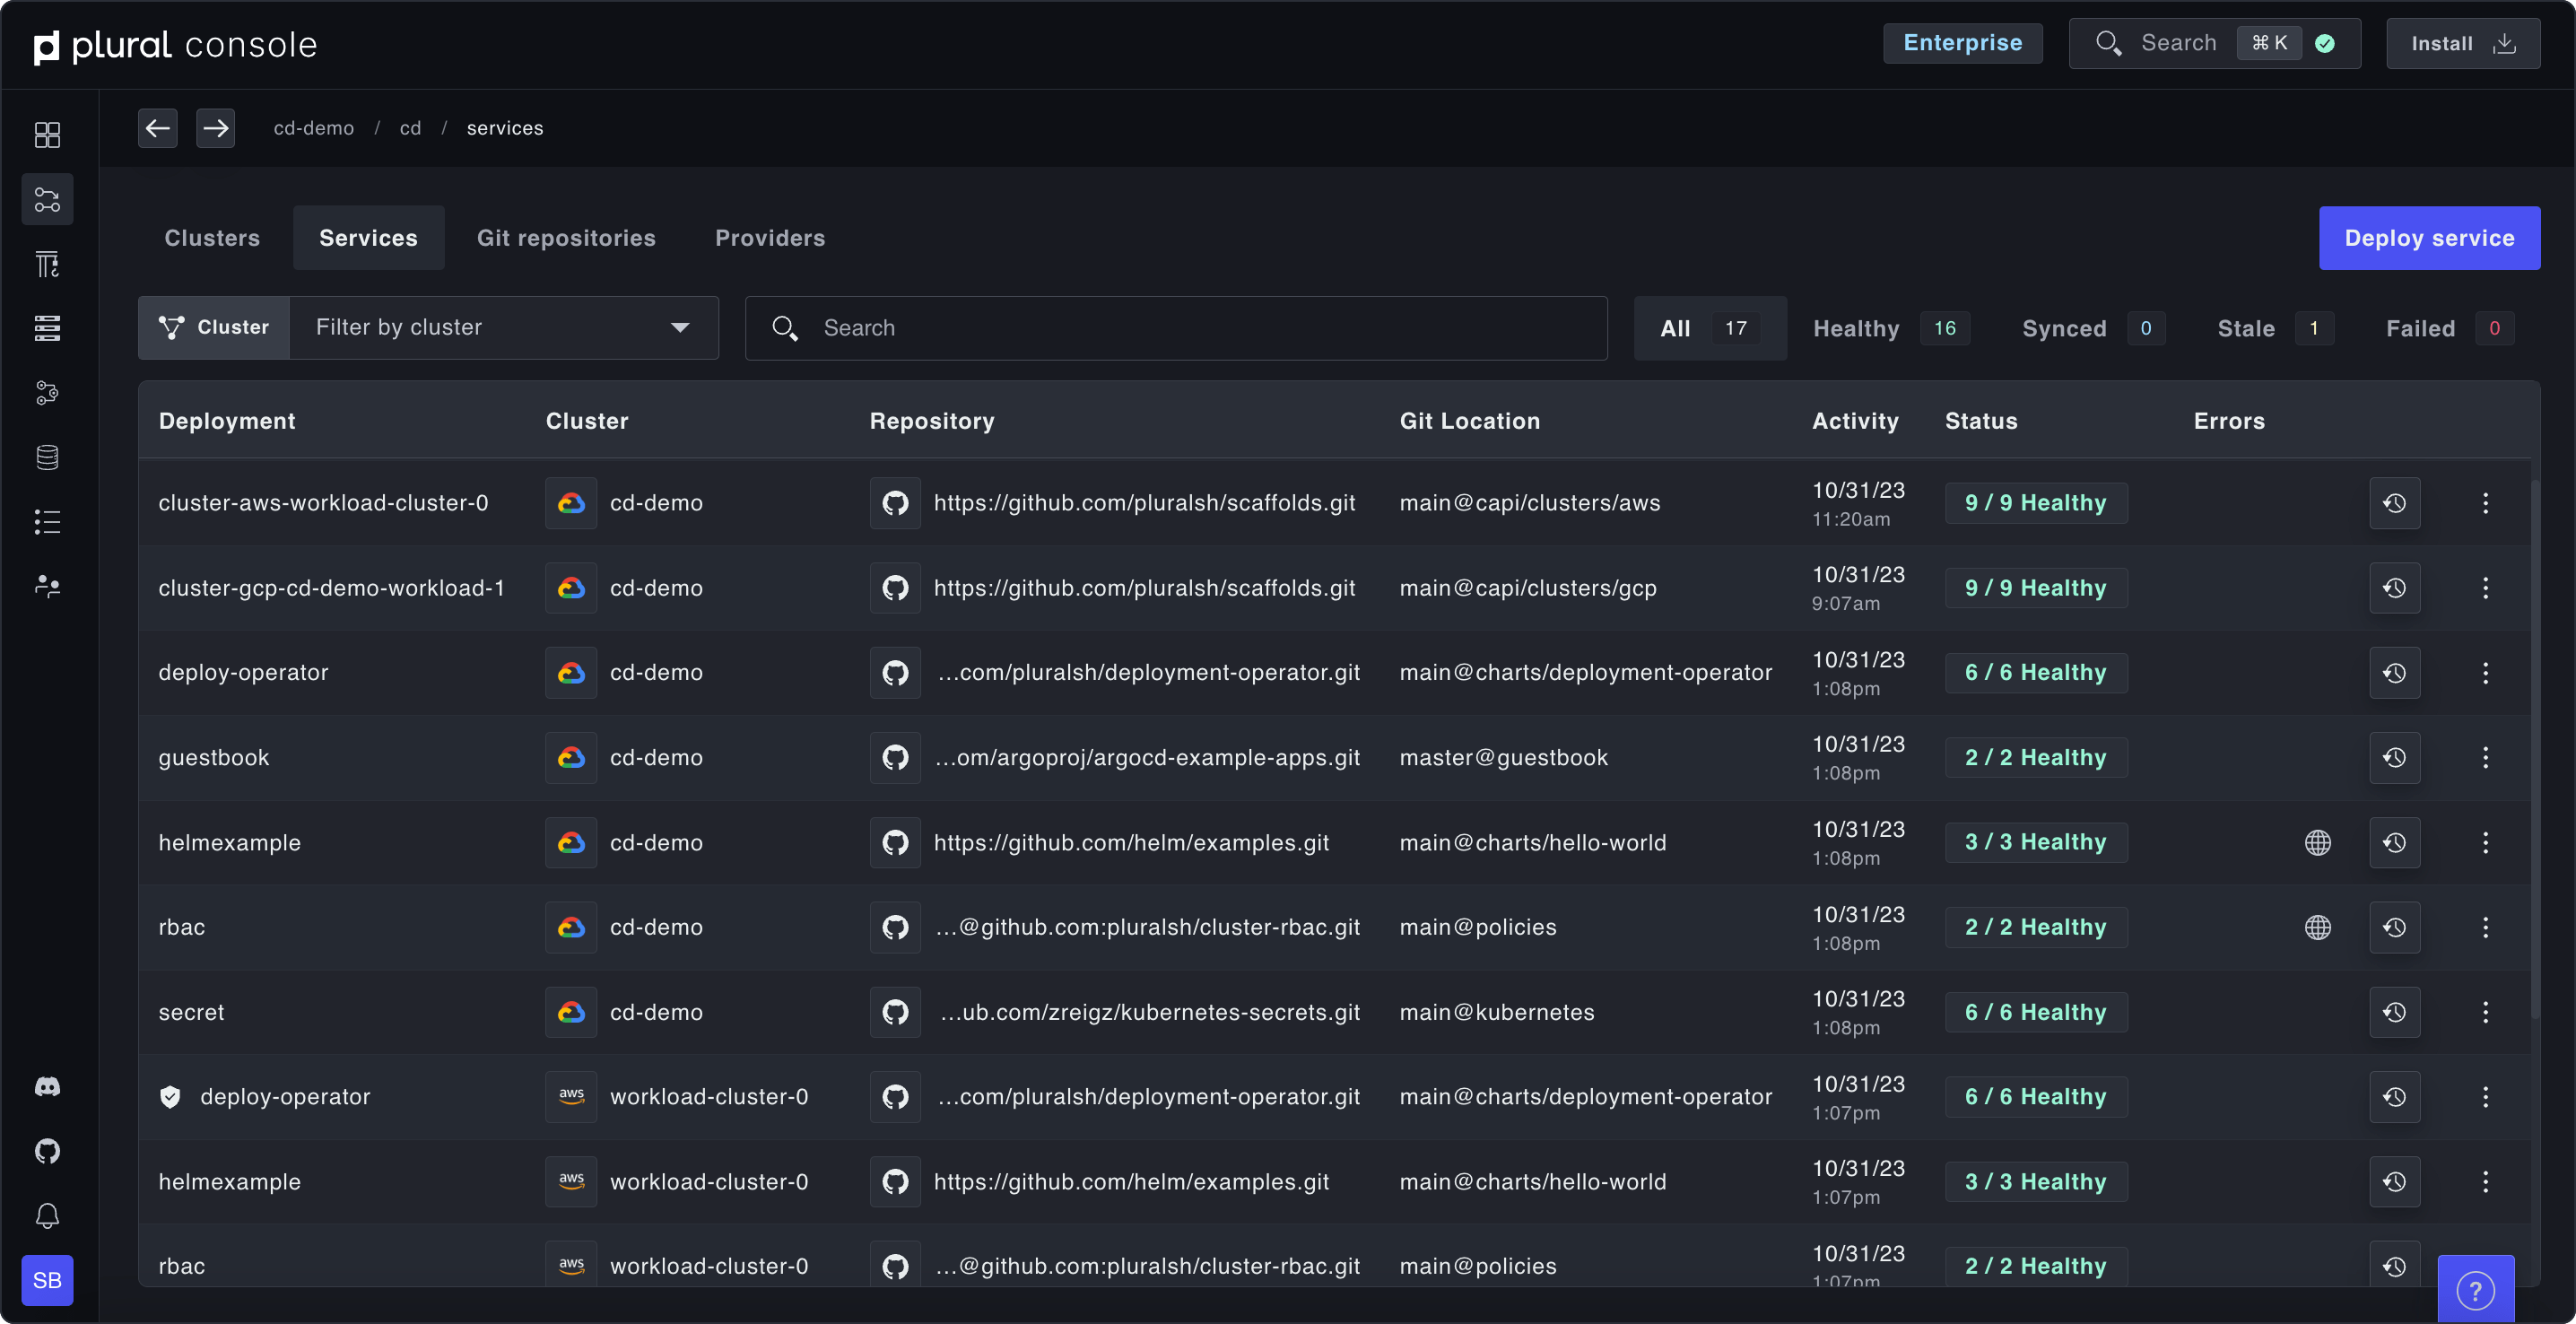
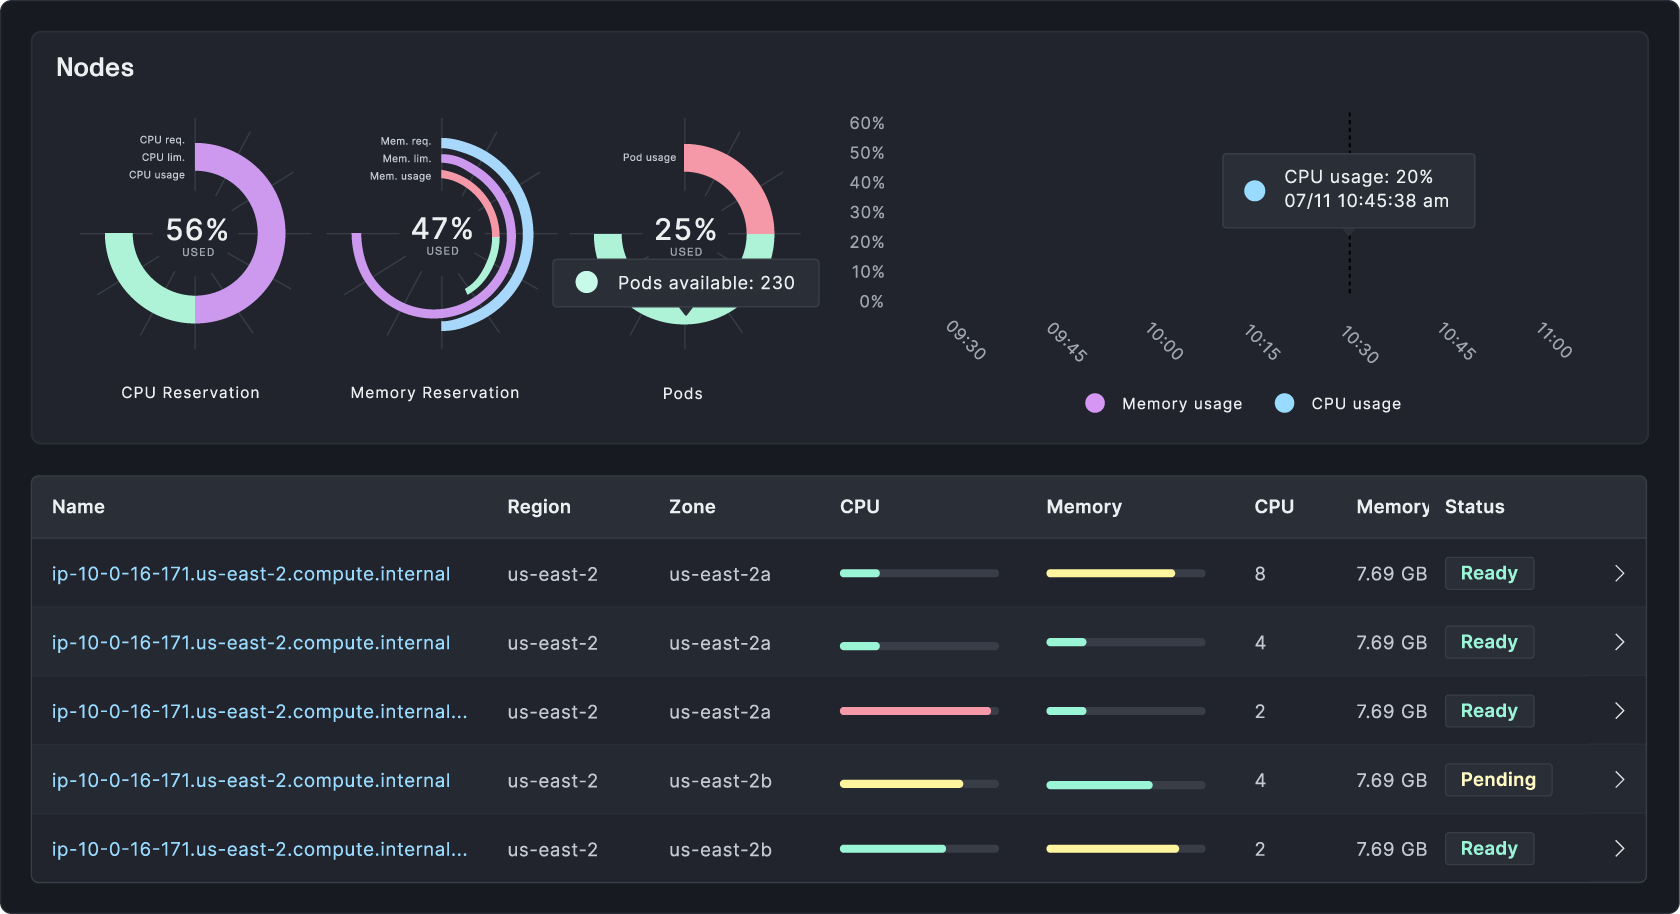
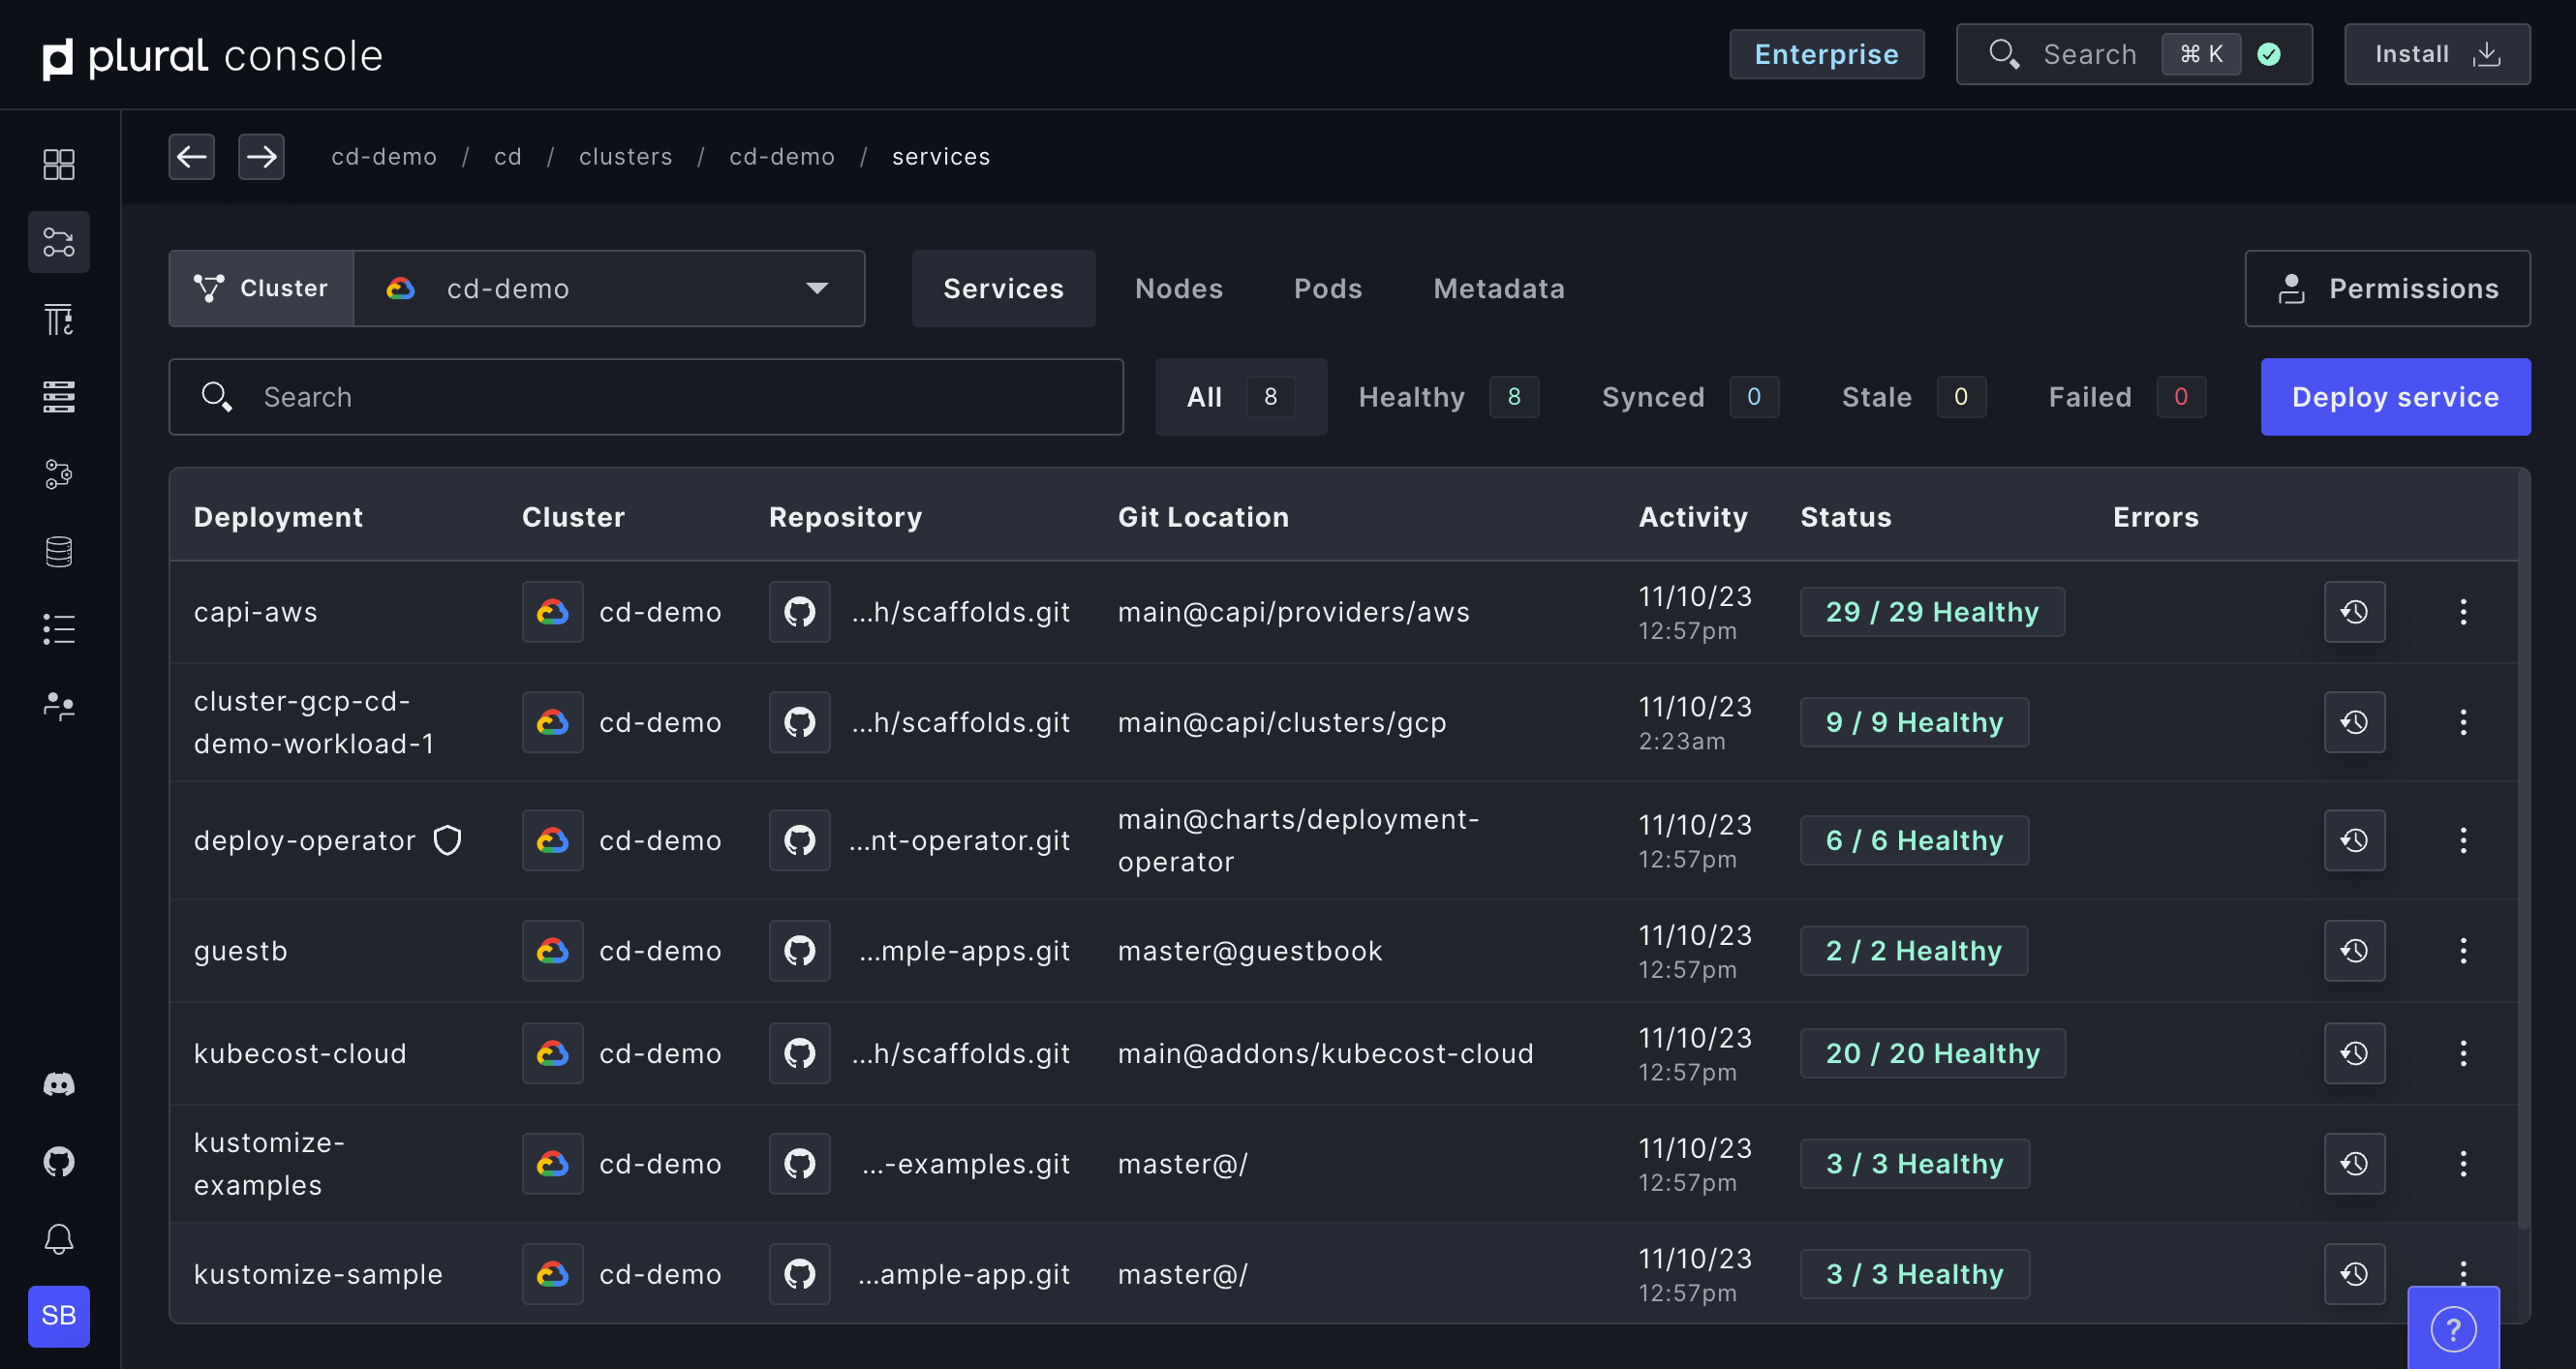
Full visibility into clusters and services with Plural Console
Gain insight without compromising Kubernetes security best practices like private control planes using outbound bidirectional gRPC. Leverage our Kubernetes auth proxy to drill into any Kubernetes resource to have a complete understanding of your entire environment(s).
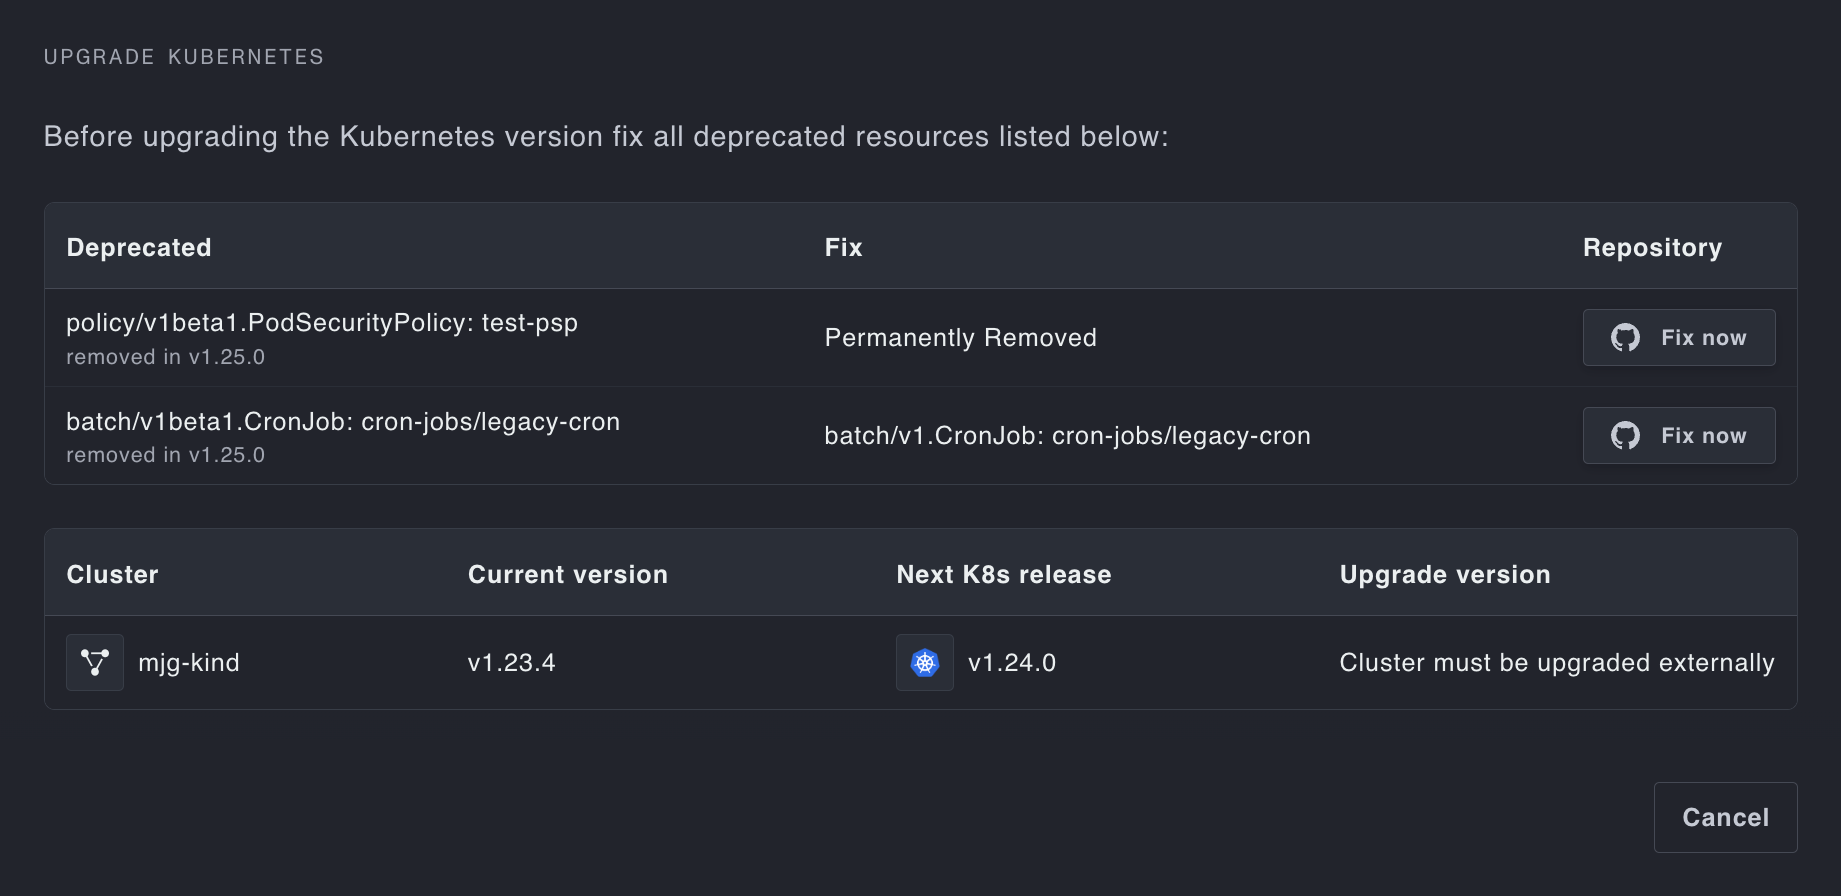
End to end lifecycle management
Managed, zero-downtime upgrades with Cluster API reconciliation loops; don’t worry about sloppy and fragile terraform rollouts. Handle Kubernetes API deprecations with ease with our built-in deprecation detection.
Deep dive into the product
What companies are saying about us
We no longer needed a dedicated DevOps team; instead, we actively participated in the industrialization and deployment of our applications through Plural. Additionally, it allowed us to quickly gain proficiency in Terraform and Helm.
Walid El Bouchikhi
Data Engineer at Beamy
I have neither the patience nor the talent for DevOps/SysAdmin work, and yet I've deployed four enterprise-caliber open-source apps on Kubernetes... since 9am today. Bonkers.
Sawyer Waugh
Head of Engineering at Justifi
This is awesome. You saved me hours of further DevOps work for our v1 release. Just to say, I really love Plural.
Ismael Goulani
CTO & Data Engineer at Modeo
Wow! First of all I want to say thank you for creating Plural! It solves a lot of problems coming from a non-DevOps background. You guys are amazing!
Joey Taleño
Head of Data at Poplar Homes
We have been using Plural for complex Kubernetes deployments of Kubeflow and are excited with the possibilities it provides in making our workflows simpler and more efficient.
Jürgen Stary
Engineering Manager @ Alexander Thamm
Plural has been awesome, it’s super fast and intuitive to get going and there is zero-to-no overhead of the app management.
Richard Freling
CTO and Co-Founder at Commandbar
Video demo – Plural Quickstart Demo
This guide goes over how to get started deploying services with Plural Console.
Browse all