Managing a Multi-Cluster Application Portfolio with Plural GitOps
In this article, you'll learn how to manage a set of multiple clusters and different environments using GitOps and Plural.
As your platform team scales and the surface area of your application deployment grows, managing all the various environments and the Kubernetes clusters inside those environments becomes increasingly difficult. Tools like Rancher and OpenShift help, but often require a ton of context switching and manual promotion steps between the various environments, which introduces the potential for human error.
The easiest way to solve this is with Plural Cloud, a fully managed GitOps platform that eliminates the complexity of self-hosting and maintenance. For teams that need the flexibility of self-hosted infrastructure, Plural also supports self-hosted deployments. In this article, you'll learn how to manage a set of multiple clusters and different environments using GitOps and Plural.
Why Multi-Cluster Management Is Hard
When you're on a team building an application of any meaningful size, you'll ideally have more than one environment to deploy it into. This typically means a development environment for bleeding-edge changes, a staging environment where stakeholders can review those changes, and a production environment for your end users to interact with. Because teams are making changes to each of these environments, often independently, config files may not match the actual configuration of each environment. This makes errors difficult to debug and environments challenging to replicate.
On top of that, deployments that occur through UI-based tooling are often impossible to replicate or audit, because pipelines are custom-built for each organization or even each team. Inspecting and understanding what happened with a particular deployment or promotion can be difficult, if not impossible.
That's where a process like GitOps comes in. GitOps is a framework that applies the tried-and-true practices of DevOps (like version control and CI/CD) to infrastructure automation. But any process that aims to fix the complications of managing multiple clusters is only a worthwhile investment if that tooling is supported across multiple environments.
What Makes Plural Different
Plural takes a git-first approach to deployments, which means you get built-in support for environment-specific overlays and promotion workflows, without needing to cobble together custom solutions for managing different configurations across environments.
The Plural CLI handles cluster bootstrapping, secrets management, and application installations automatically, removing the manual steps that slow teams down and introduce errors.
Perhaps most importantly, Plural maintains a clean separation of responsibilities that divides your workflow into three distinct areas:
- Infrastructure as code for managing your underlying cluster resources.
- Application definition for specifying how your applications should be deployed.
- Environment promotion for controlling how changes flow between environments.
This separation means your teams can work independently without stepping on each other's toes, while still maintaining the consistency and reliability that's required for production workloads.
Let's take a look at how to manage a multi-cluster application with Plural and GitOps.
Setting Up and Managing a Multi-Cluster Application Portfolio with Plural
The recommended approach is to use Plural Cloud, which provides a fully managed platform that handles cluster provisioning, GitOps automation, and infrastructure management. Simply sign up at plural.sh and follow the onboarding flow to connect your Git repositories and cloud accounts.
For teams that prefer self-hosted infrastructure, you can set up your own management cluster:
- Download and install Plural CLI, as well as the dependencies in this GitHub repo.
- Create a management cluster. You can either bring your own cluster or use
plural up.plural upcreates a new management cluster on the major clouds and wires up a basic GitOps setup. - After
plural upruns, head over to https://{your-console-domain}/pr/scm to set up the connection between Plural and your favorite source control provider. Once set up, you should see an SCMConnection CR in thebootstrap/pr-automation/directory of your repo.
Here's a gist to help with the self-hosted setup. Whether you choose Plural Cloud or self-hosted, you'll be ready to create clusters once your initial setup is complete.
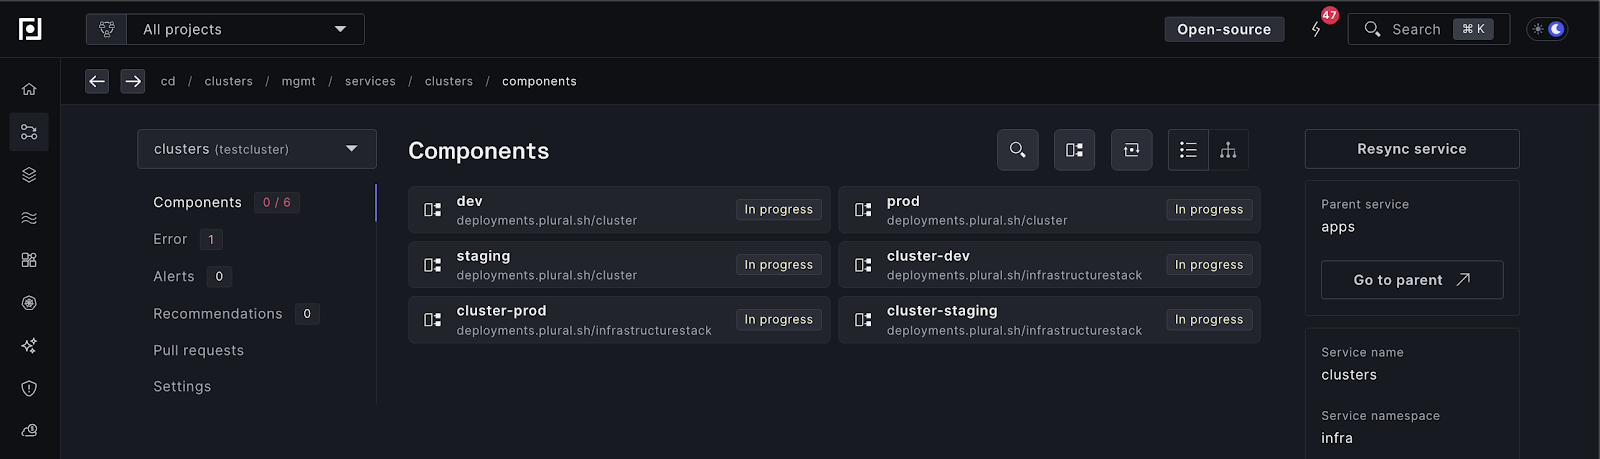
Set Up Dev, Staging, and Prod Clusters
When setting up your clusters, we recommend that you use Plural's infra service catalog, which provides predefined PR automations for cluster provisioning. This eliminates manual configuration and ensures compliance with enterprise standards through "Golden Paths" for infrastructure creation.
With the infra service catalog, you can:
- Use self-service PR automation to provision workload clusters
- Leverage predefined templates that handle cluster configuration automatically
- Set up upgrade pipelines that orchestrate staged deployments across environments
For teams that need to understand the underlying infrastructure, here's what Plural creates behind the scenes when using the service catalog.
First, it generates cluster definitions like this one for your dev environment:
This keeps your configuration relatively simple, but gives you the ability to build on each of these clusters in the future by adding to these configuration files.
Next, create the infrastructure stack for this cluster by creating services/clusters/aws/stacks/dev.yaml and filling it out like this:
Once you have these two files configured, you can create similar files for your staging and production clusters, making any necessary infrastructure changes in these configuration files. For example, production environments often have slightly different infrastructure needs from dev environments.
After you commit and deploy each of these pairs of files, Plural will get to work spinning up the various clusters you've defined.
Add an Application to Your Cluster Portfolio
Once the clusters are set up, you need to associate your various applications with them. The recommended approach is to use Plural's service catalog for deployment flows, which provides predefined automation for setting up GitRepository and ServiceDeployment resources with proper CI/CD pipelines.
For teams that need to understand the underlying configuration, here's what the service catalog creates behind the scenes. It generates a GitRepository resource like this one at bootstrap/repositories/myapp.yaml:
If your repo isn't public and requires authentication, make sure to add the necessary authentication in the Plural UI, or reference an SCM connection that has the appropriate access when creating this file.
Next, create a base ServiceDeployment inside bootstrap/services/myapp-base.yaml that contains common settings shared across all environments and connects your repository to the deploy engine. It looks something like this:
Create the environment overlays that allow you to make tweaks and changes for each of the three environments, while still avoiding the config drift mentioned earlier. Because these files are environment-specific, they can differ in their implementation. For example, while your dev config might be relatively basic, your production config might look something like this, with information about replica configuration and more specified directly:
Since each of these only includes the changes from the base configuration, they can be specified efficiently.
Once these files are created, you can commit them and open a pull request for the changes. This is the core GitOps flow in action: make changes to the config files, open a PR, review, and merge.
Deploy to the Development Cluster
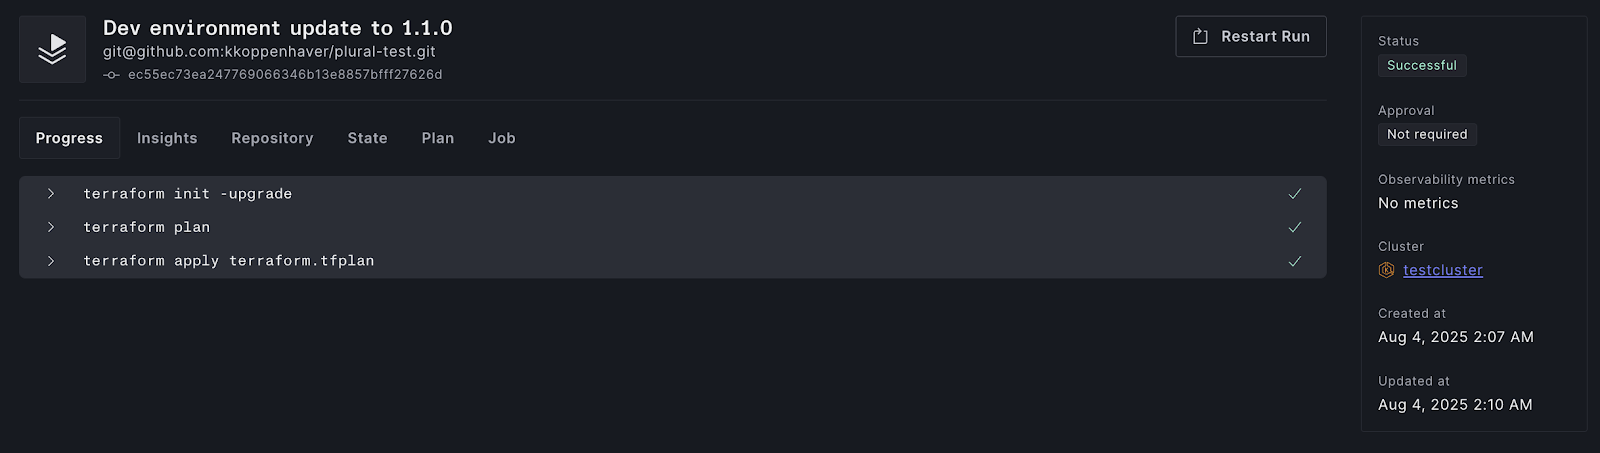
Now that you've created your environment overlays, let's deploy to the dev cluster by updating the dev-specific configuration.
Your bootstrap/services/myapp-dev.yaml overlay (created in the previous section) should target the dev cluster and include development-appropriate settings:
To deploy a new version, update the helm.values.image in this overlay, commit the change, and create a PR from a clean branch. Once this change hits the main branch, Plural will make the necessary updates to the dev cluster:
Promote to Staging and Production
Once your changes are live and tested in dev, you'll want to promote them through your environments using the same GitOps workflow. Just like you did with your dev environment overlay, update your staging environment overlay with the updated version number:
Once you've modified this file with the new tag, create a branch, push to your source control provider, and create a PR. Once you merge this PR into the main branch, you'll see your staging environment updated just like your dev environment was.
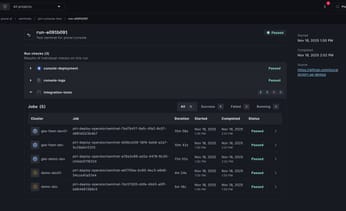
You can use either the helper function in the CLI or the Plural UI to verify that your changes have propagated to the new environment:

And finally, when you're ready to promote these changes to production, follow the same process: update your environment overlay, create a PR, and merge it.
This entire promotion process is reviewable in your source control provider of choice and logged in the Git history for your project. There's never any uncertainty about what changes were deployed and when. Reverts of deployments are easy using the revert process that already exists in git.
How Does Plural Compare to Other Multi-cluster Tools?
This git-driven flow works well for our purposes here, but other tools lend themselves to slight variations in this flow, with both benefits and drawbacks.
Rancher
Rancher is excellent for UI‑driven fleet management. This means you can stand up or import downstream clusters, carve up projects/namespaces, and handle RBAC without touching a terminal. It's capable (with a couple of addons) of doing the kinds of GitOps flows implemented in this tutorial. However, the promotion process is something you have to customize, which makes it more cumbersome than the flow you saw here.
If you prefer your ops to be point-and-click, it can be a great tool, but the promotion process isn't as explicit and reviewable as what you just implemented with Plural.
OpenShift
OpenShift is similar to Plural in many ways: you define Apps/ ApplicationSets, model overlays (Helm/Kustomize), and then wire your own promotion mechanism (typically PR merges between env folders/branches) or a pipeline that bumps versions across clusters. However, promoting between multiple environments still requires you to set up and configure the pipelines that will power the promotion.
Plural
Contrast Rancher and OpenShift with Plural, where environments and promotions are Git‑native from the start. Clusters are provisioned and tracked as code (InfrastructureStacks), apps are defined once and overlaid per env, and PR Automations plus Pipelines turn promotion into an auditable pull‑request flow with optional approval gates. If your goal is "do it in Git, then let the platform reconcile", Plural is set up that way by default.
Wrapping Up
With Plural, you get a clean, Git‑first path from idea to production: spin up dev/staging/prod via PR automation, define your app once with a GitRepository and base ServiceDeployment, keep differences isolated in lightweight overlays, and move changes forward with reviewable pull requests.
If you’re ready to put this into practice for yourself, head over to Plural and spin up your first cluster today.

Newsletter
Join the newsletter to receive the latest updates in your inbox.


